Frequently I am coming up against the same conversations with customers on how to create audio message greetings for Microsoft Teams Auto Attendants and Call Queues. As a result, I thought I would share a short guide on how to do this using Audacity.
To begin with you will need to know the system requirements for the audio file. Microsoft state the following:
- File size must be less than 5MB
- File format must be .mp3, .wav or .wma
In addition some consideration must be made to how the file is played over the telephone. The PSTN uses G.711 audio codec which has a sample rate of 8,000Khz and almost always plays in mono (because you only use one ear when using a receiver and therefore, stereo is just stuff you don’t need). That said, mobile phones now come with HD voice support for PSTN calls which allow for better quality audio, but you always should plan for your worst user…
Step 1 – Download and Install Audacity
First thing is first, download and install Audacity here. It is a simple installation that you can accept the defaults and continue through the wizard.
For the purpose of simplicity we are going to create a .wav file. WAV is a native extension to the Audacity default program. To create an MP3 file requires an add-on which we will not go into here.
Step 2 – Setup Your Recording Parameters
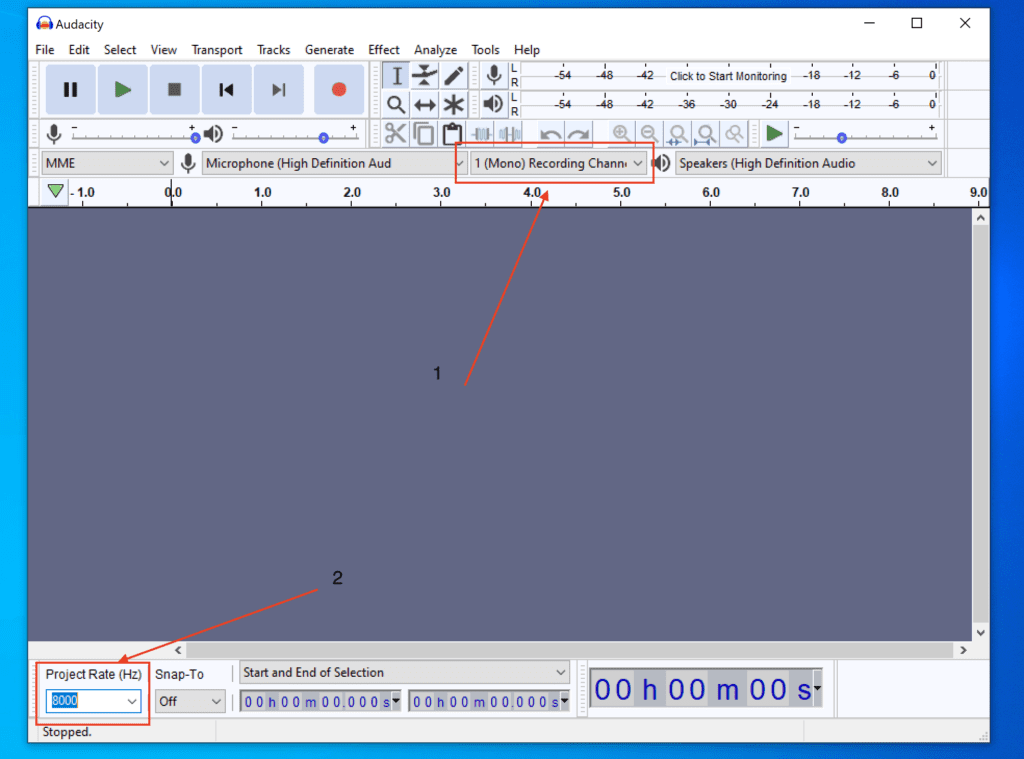
Open Audacity and set the Recording Channel to Mono (1) and the Project Rate to 8000 (2)
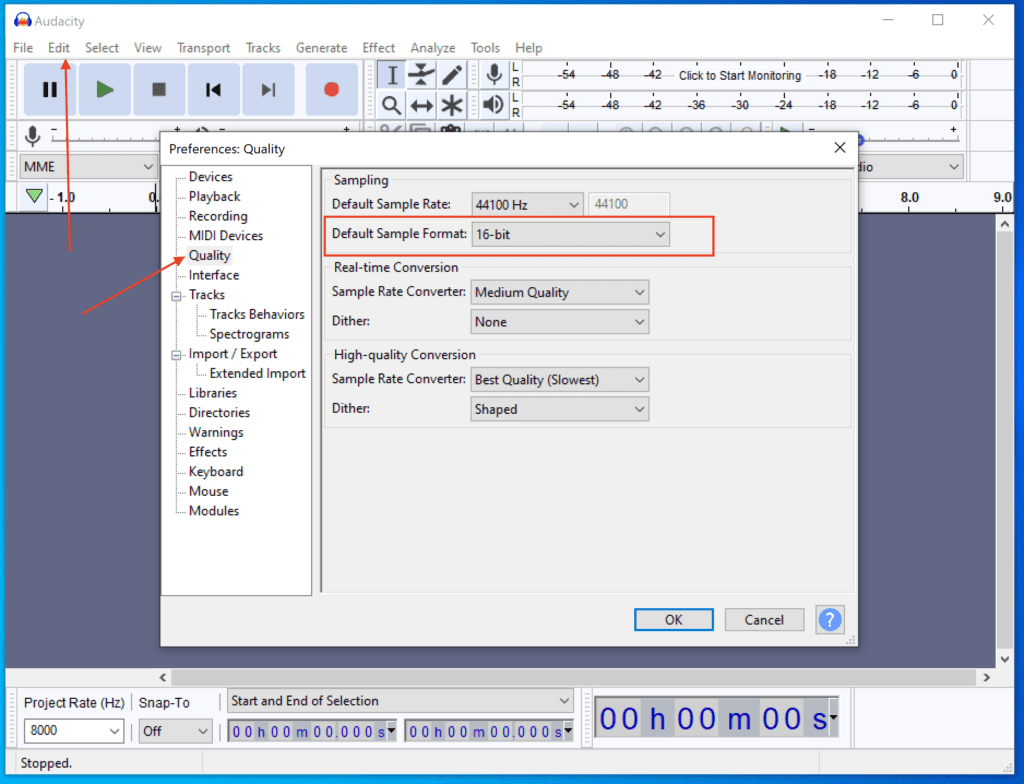
Next, click on Edit in the top menu and select ‘Preferences’. From the menu box that appears, click on Quality and change the Default Sampling rate to 16KHz
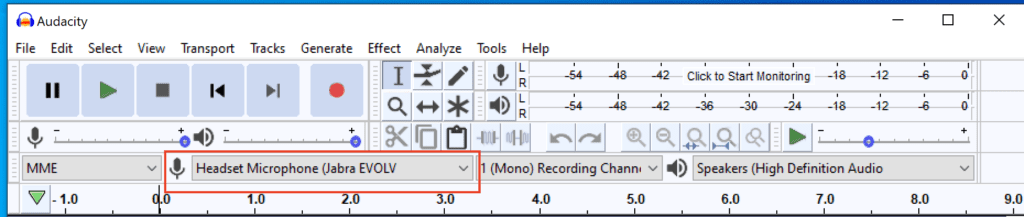
Finally, make sure your microphone is selected
Step 3 – Create Your Recording
When you are ready, press the record button to start your recording
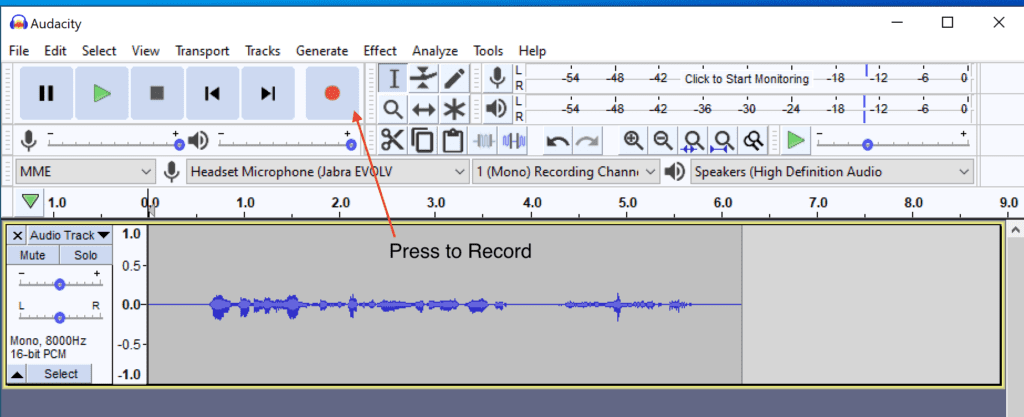
To stop recording press the “Stop” button.
Now that you have your recording, after playing back you will realise that there is silence before and after your message. This is because of the brain delay in pressing record and then speaking. You will need to remove that otherwise the greeting will feel delayed to the caller.
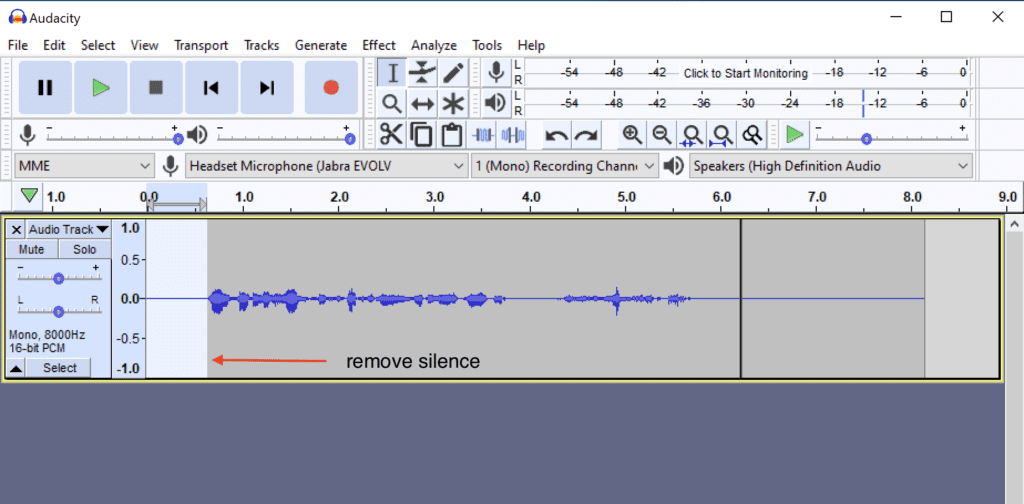
To do this, click the point in the timeline where you begin to speak (see waves). Then hold down left click and drag to the left or right to highlight the silence (flat line). Then go to Edit and Press “Delete”
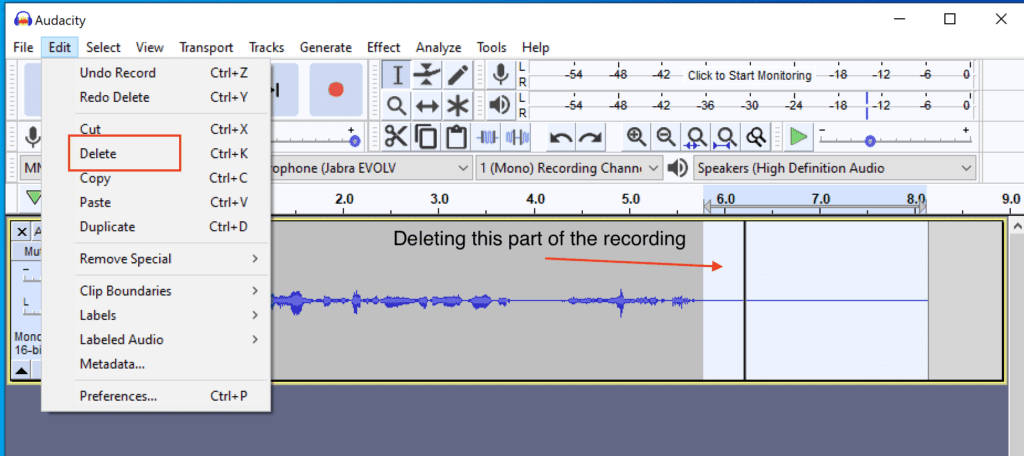
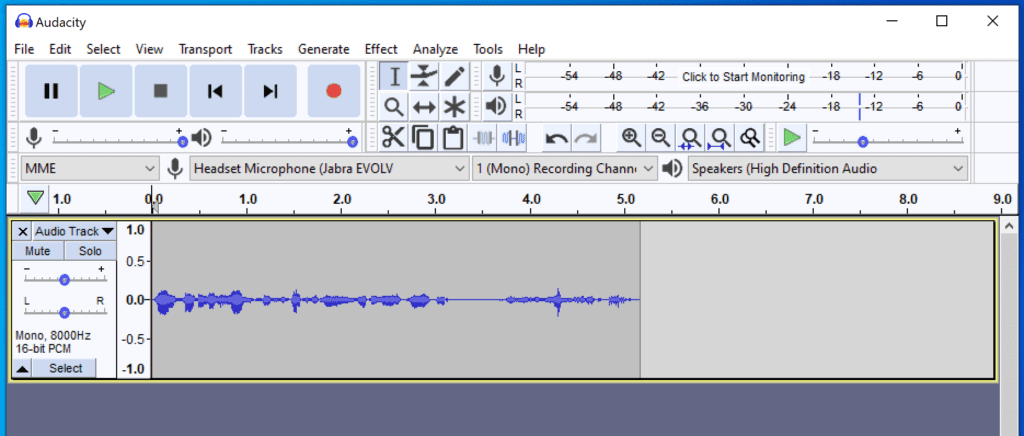
You should now be left with just the recording
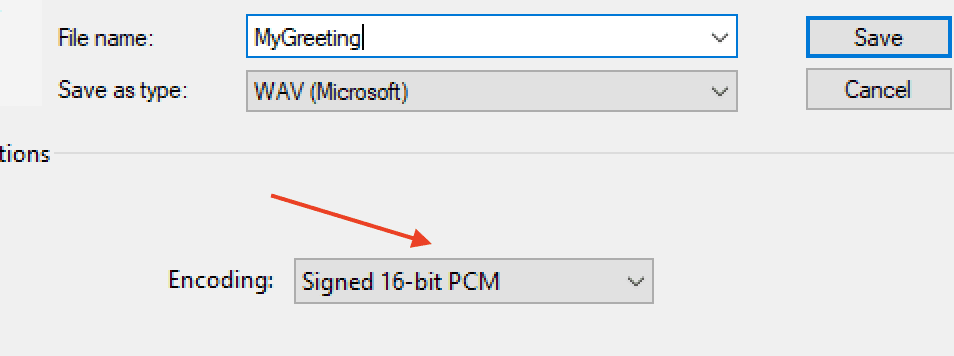
Step 4 – Save the Recording
Now you have a recording you need to save it as a WAV file. Go to File > Export and Export as WAV
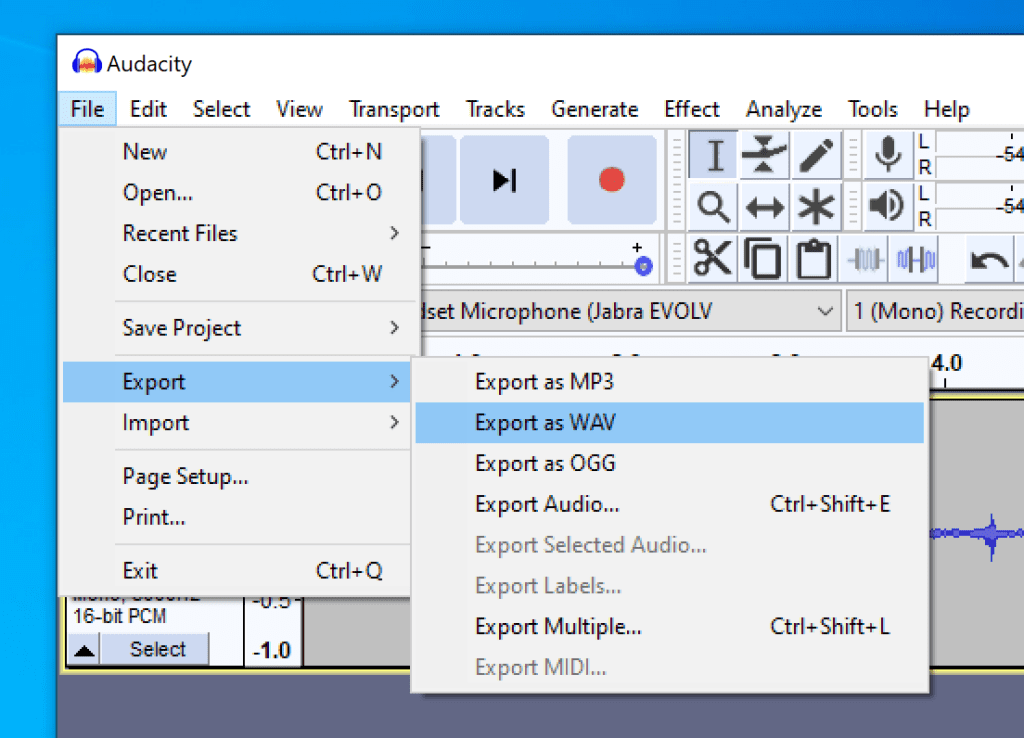
Make sure the coding is set to Signed 16-bit PCM.
Press Save. You will be prompted to enter track information after this. You can ignore this and just press OK. It is not needed.
Now you are ready for your message to be uploaded to the Auto Attendant.