Part 2 – The Registration to Auth Journey.
Now that we had a user account created for each Attendee we needed a way of first inviting that account to our conference tenant and then into the team made specifically for the event.
In our automation flow on the auth tenant we needed to pass the account created into our conference tenant. We already had the solution, creating another HTTP endpoint, this time on our conference tenant and then passing over the account details to another Power Automate process flow on the conference tenant.
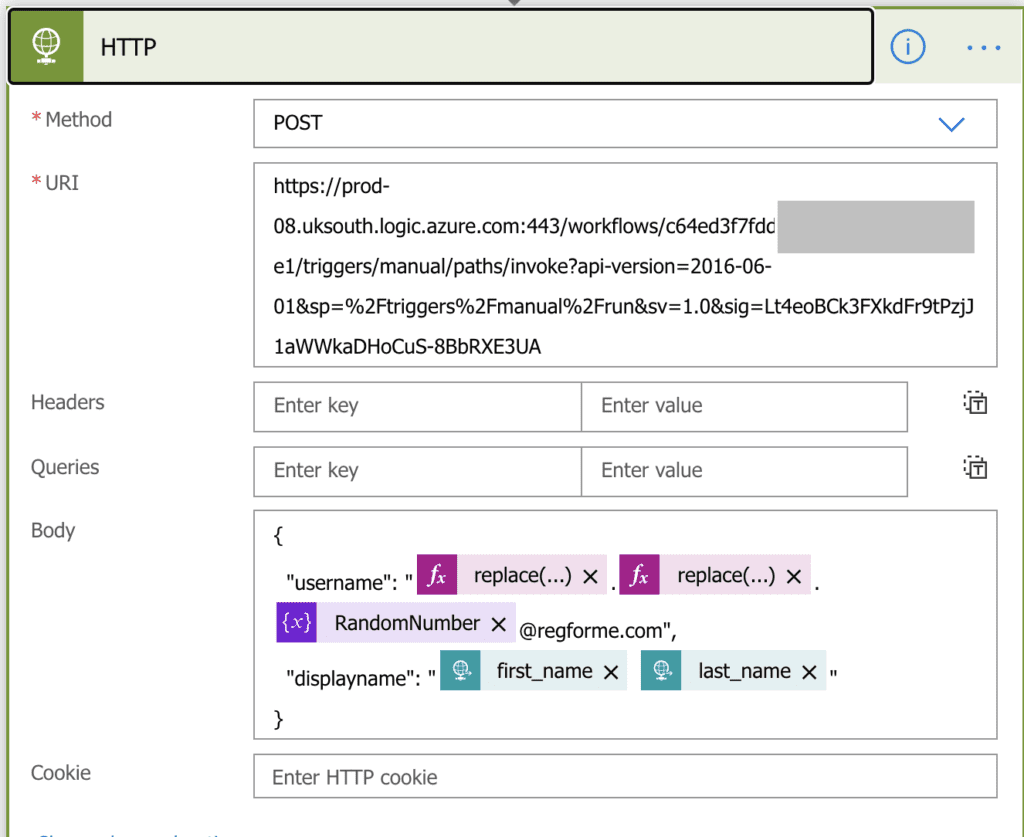
Here you can see that we are only passing the auth username and the person’s first and last name to the conference tenant. No other information about the Attendee is known to the conference tenant.
Inviting the Attendee as a Guest
On the conference tenant a Power Automate flow was created with a trigger being set when a HTTP request has been received.
Following that the first step we need to make a Graph API call to request the AzureAD Guest Invitation as no native action is found in Power Automate for this process.
For details on how to setup access to Graph please read “Using Flow with Graph API” blog by Lee Ford.
Once you have your app registered in Azure, you will need to grant the following API permissions:
- Directory.ReadWrite.All
- Group.Read.All
- Group.ReadWrite.All
- GroupMember.Read.All
- GroupMember.ReadWrite.All
- User.Invite.All
- User.Read
Important!
You must have created your team in Teams before continuing. You don’t need the team to be completely built, just created. You will need to copy the Teams URL for the team to use as part of your Guest invitation.
If you don’t do this, then the Attendee will be invited into AzureAD, but the Teams client will not see the invite to the team and therefore it cannot be claimed. This results in the Attendee not having access.
Now you know the rules. Add a HTTP post action to the flow to invite the Auth account to the tenant.
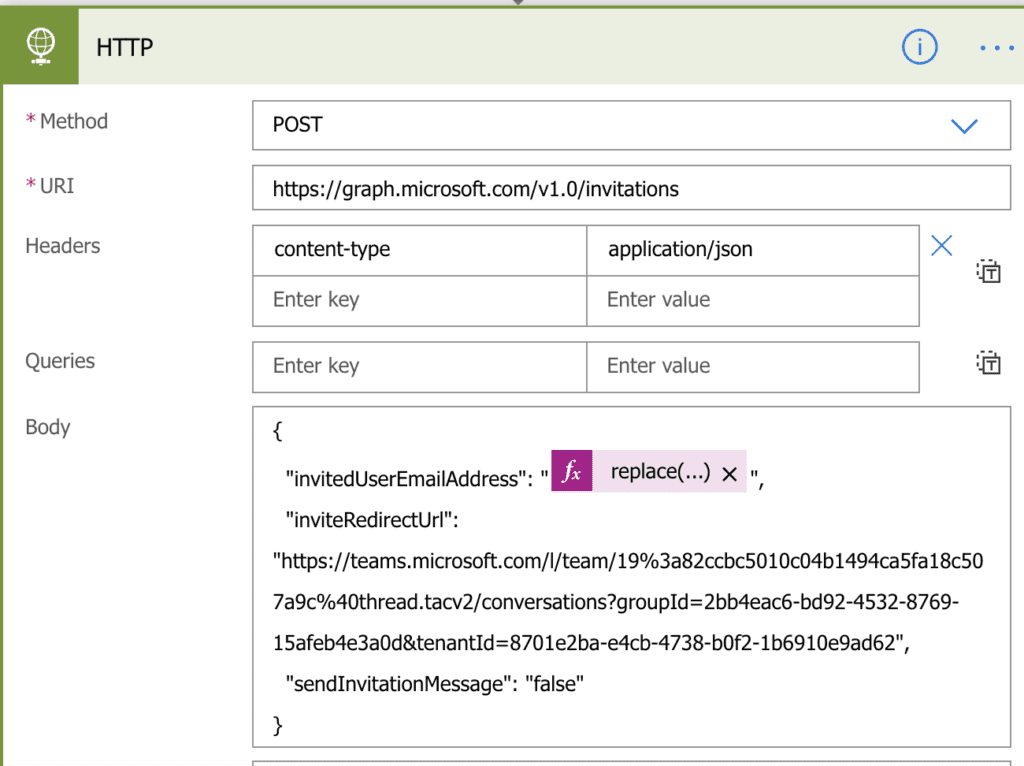
The redirect url is what the Teams client will look for in order to claim the invitation. The send invitation message is set to false because the Auth account on the other tenant is not mail enabled, so the message will NDR anyway. It also saves a little time on processing.
The invited user email address is the username passed through to the flow from the Auth tenant. Here is is wrapped in a replace to remove any whitespace for belts and braces.
Next we needed to parse the JSON response from Graph to get the AzureAD Object ID or UPN of the invited guest.
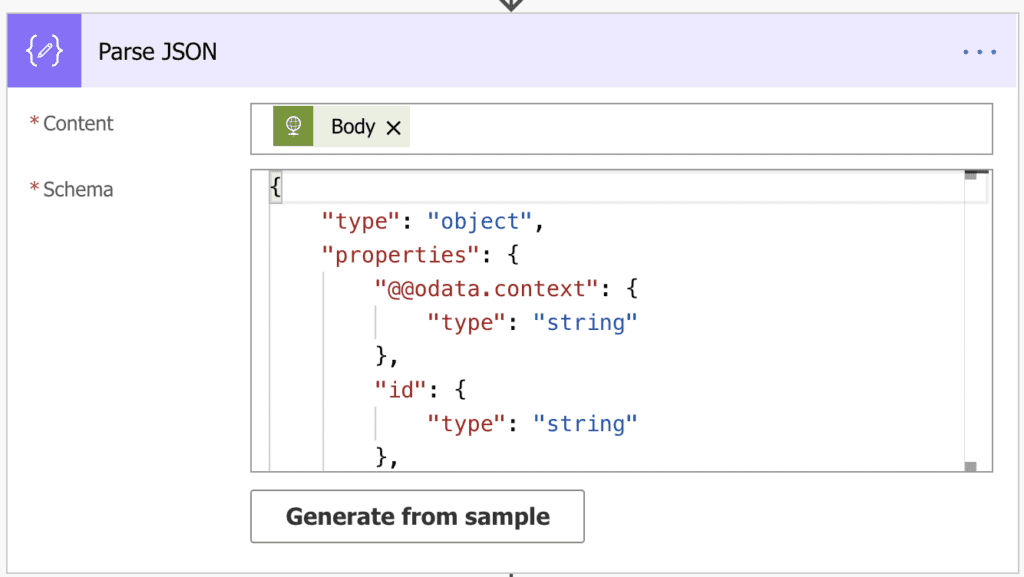
You can use a REST client such as the Graph Explorer to find the expected response schema for the endpoint.
The next step is to update the guest account to include a display name. Without doing this the account will be created, but it won’t look very nice in Teams as just [email protected]. So we added an update user action from the out of box integration with AzureAD
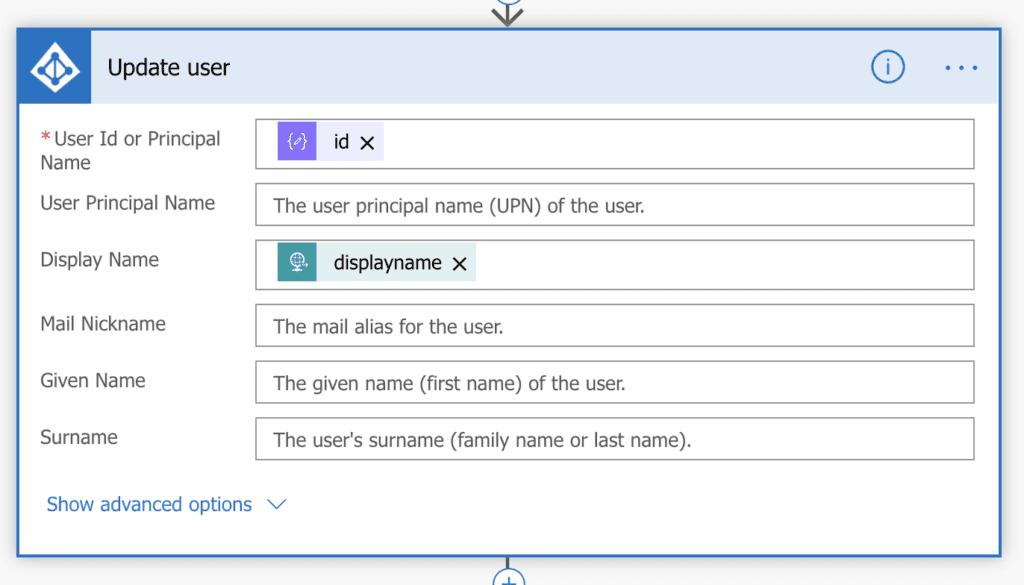
Here we took the display name sent to the flow from the auth tenant HTTP Post data.
Adding to Teams
Now, you might think that the next step was to add this person to the Team by either using the Graph API add member endpoint or simply by adding the guest to the Office 365 Group that underpins the Team.
At the time we uncovered a bug with both of these ways. If we added a guest account either by API or by adding them to the Office 365 Group using AzureAD “Add User to Group” action then AzureAD saw these users as role “Guest” in the team group. However Teams (and interestingly not the Teams Admin Center), but the client identified these Guests as a full Team Member.
This is an important distinction because in doing so meant that when the Attendee tried to claim their invitation to access the conference team as a guest, Teams recognised them as a Member and therefore performed a license check. Obviously failing and denying them access.
There where only two ways in which we could get the Attendees into the team with the proper classification of Guest.
- Add each one manually by UPN using the Teams client
- Add guests to an AzureAD Security Group and then periodically keep adding the group to the team using the Teams client.
Naturally we opted for the 2nd option. But there is a quirk in that the Group members need to be under 1,000. So we had to make sure we kept an eye on membership and swap the groups when they reached capacity.
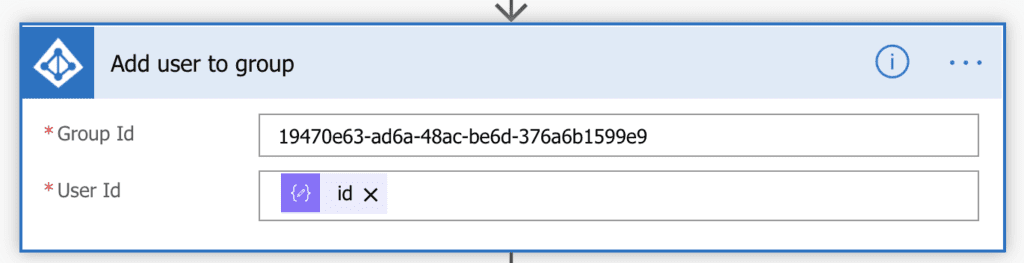
Our last step was to add the Guest account to this AzureAD Security Group in Power Automate
All that remained was between the organisers to keep adding guests to the team using the Teams client and the name of the Security Group.
We did raise this with the Teams Product Group who acknowledged this to be a bug. Unfortunately, the fix wasn’t pushed out in time for our event. Maybe it has now.
Part 4 – Securing the conference tenant